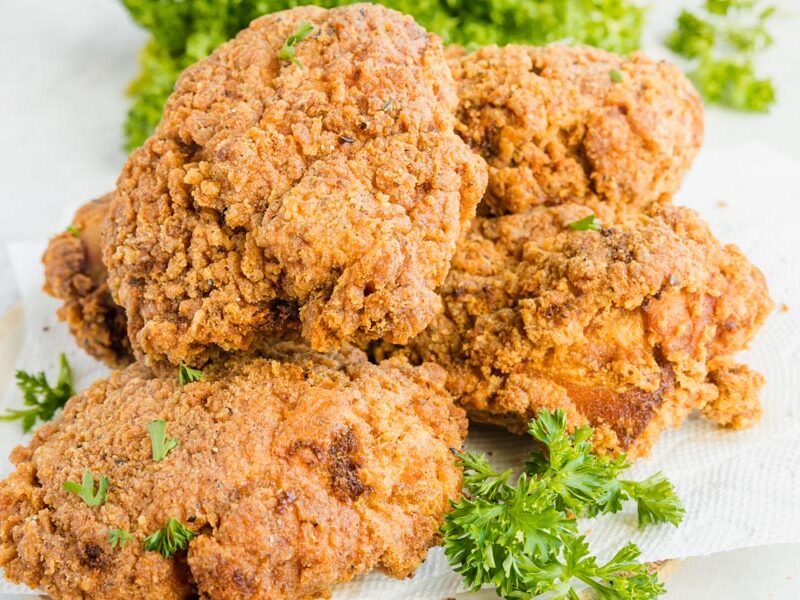
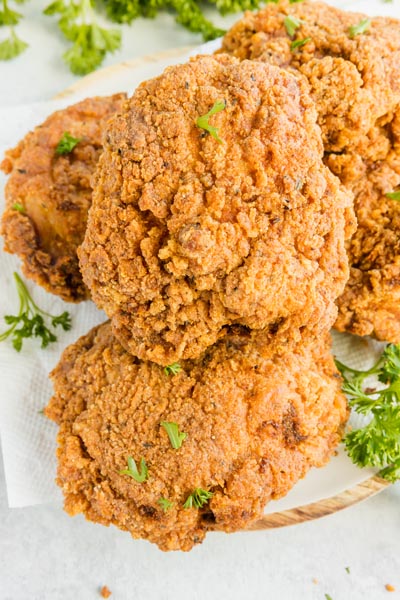
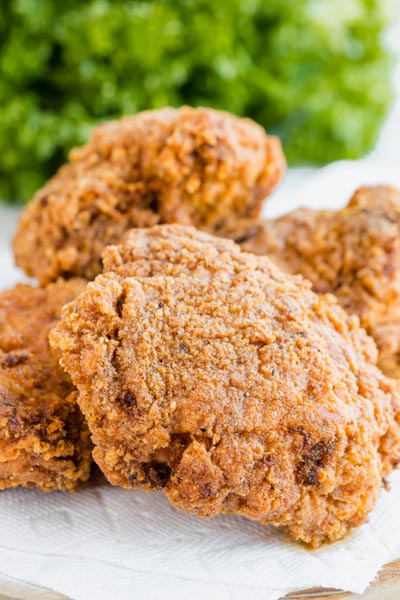
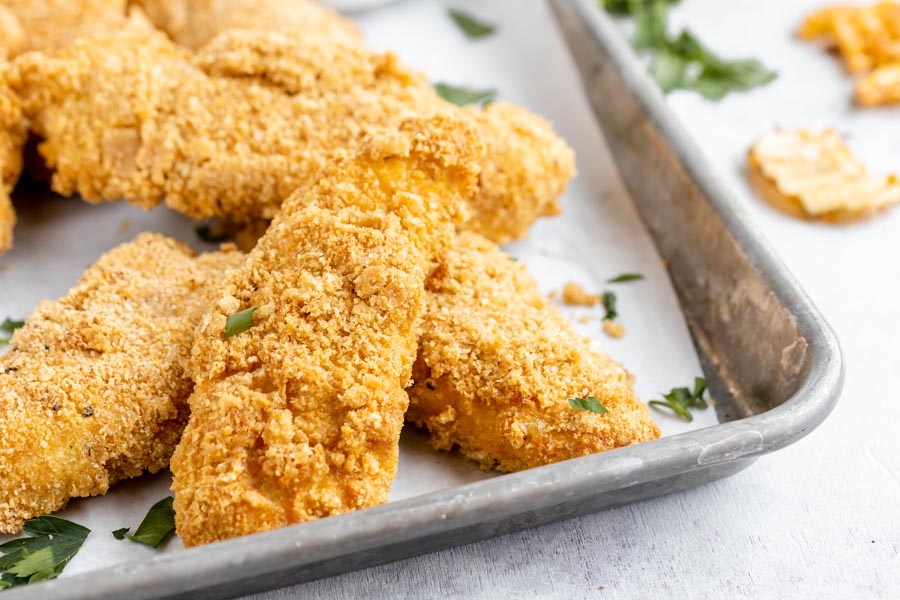
After years perfecting a KFC copycat spice blend, this crispy, juicy keto fried chicken has a coating that actually holds up in the deep fryer. I let the salted chicken rest 30 minutes first, dip it through a homemade buttermilk wash, then fry at 350°F for 12 to 15 minutes until it reads 165°F. 1.9g net carbs and 40.7g protein per piece.
I've been deep frying chicken on keto since 2018, and finding a breading that actually survives hot oil took me way longer than I want to admit. Almond flour? Slides right off. Pork rinds? Same thing. I ran a side-by-side test with every low carb coating I could get my hands on, and whey protein powder was the only one that held through the entire fry. That experiment is what this whole recipe is built on.
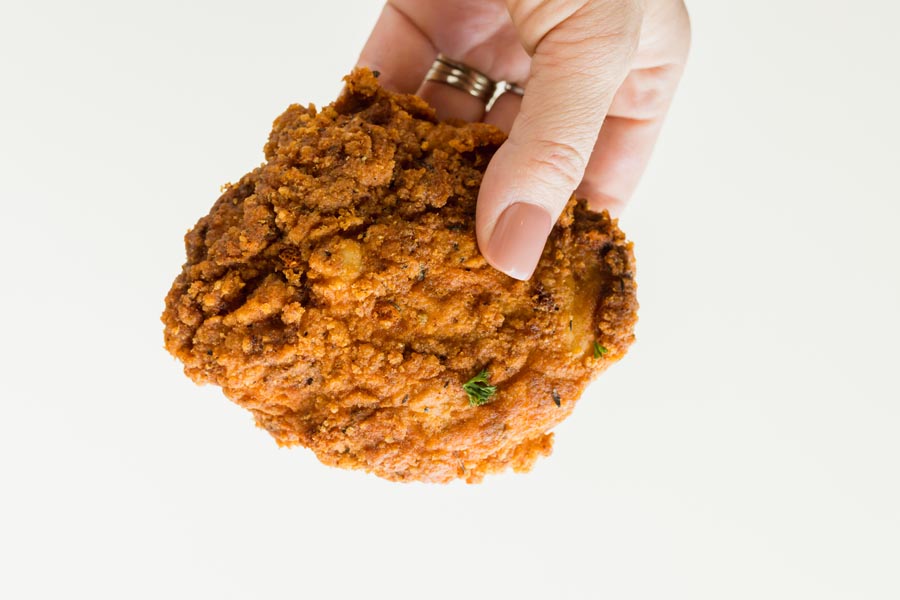
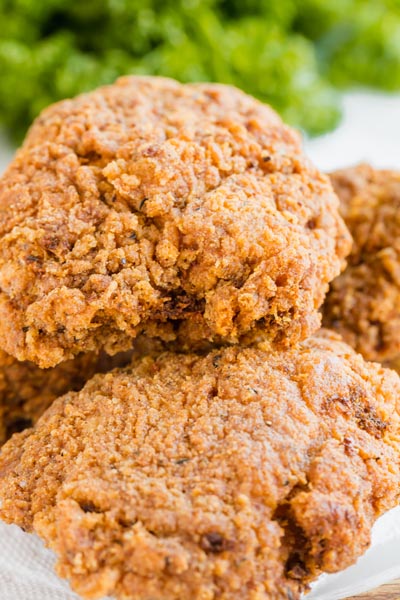
The coating is homemade buttermilk, egg whites, vodka, and baking powder layered over unflavored whey protein. That combination builds flaky, crackly layers that crisp up golden and stay locked onto the skin through the whole fry. Why each piece of it matters is explained below.
Then there's the spice blend. I spent years reverse-engineering KFC's seasoning, and the two ingredients that push it into that territory are celery seed and ground ginger. Most copycat recipes leave those out. Mine doesn't. There's 3 tablespoons of smoked paprika in the mix, so the flavor is not subtle. You can add white pepper and basil if you want the full 11-herb version.
The one rule that matters more than any other: coat and fry immediately. If the protein powder sits on the wet buttermilk wash, it absorbs moisture and goes gummy. Six more rules like that sit right above the recipe card. For a skillet chicken with no fryer at all, my blackened chicken is the one I make on weeknights.
Key ingredients and substitutions
You can use any cut here: chicken thighs, wings, breasts, or drumsticks. I always keep the skin on for maximum crispiness. Bone-in or boneless is up to you.
For the Seasoning
This seasoning blend is my KFC copycat without white pepper or basil. If you want to go full 11-herb, add 2 tablespoons of white pepper and 1 teaspoon of basil to the mix.
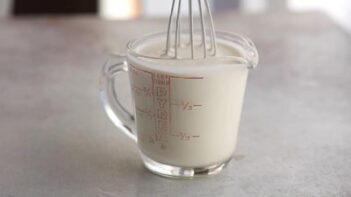
Making homemade buttermilk creates a thick paste that helps the breading grip the chicken.
Heavy whipping cream: Higher in fat and lower in carbs than store-bought buttermilk. I always have it on hand anyway.
White vinegar: This is what curdles the cream into a thick buttermilk texture. Takes about 15-30 minutes.
Egg whites: I use whites only (no yolks) because the extra fat from whole eggs adds moisture that makes the crust less crunchy. I learned this the hard way.
Neutral spirit: Vodka is my go-to. It evaporates faster than water during frying, which helps build flaky layers in the coating. Any neutral spirit works.
Breading
Whey protein powder: Use an unflavored, zero-carb whey protein powder, like the Isopure linked below. Check the label if substituting another brand.
Baking powder: Helps the skin dry quickly as it hits the oil, which means more crispiness and better browning.
Extra seasoning mix
Why this coating gets so crispy
Buttermilk changes everything
I’ve tested this with plain heavy cream, whole eggs, and just water. None of them produce the same level of crispiness. Buttermilk changes how the skin reacts to hot oil, creating a much more shatteringly crispy surface. It also acts as a brine, so the meat stays juicy underneath all that crunch.
Egg whites instead of whole eggs
I used whole eggs for my first several batches and the coating was always slightly softer than I wanted. The fat in the yolk adds moisture to the wash, which works against crispiness. Once I switched to whites only, the crust got noticeably crunchier. Small change, big difference.
Don’t skip the vodka
As the chicken fries, the heat helps cook off the alcohol in the vodka and creates a lighter, flakier coating. Cooking reduces the alcohol, though some may remain. If you prefer to avoid alcohol, simply leave the vodka out.
Baking powder or baking soda
I prefer baking powder here. It adds a bit more puffiness to the coating and speeds up browning, which means crispier, more golden results. Baking soda works too since the buttermilk provides the acid it needs to activate, but I’ve gotten more consistent results with baking powder across dozens of batches.
Which cuts of chicken I use
This technique and timing works for chicken thighs, legs, and wings. I reach for thighs most often because they stay juicy even if you go a minute over on the fry time.
You can deep fry chicken breasts too, but they take significantly longer since they’re thicker. I’d add at least 5-7 extra minutes and watch your thermometer closely.
Whatever cut you choose, bone-in or boneless is up to you, but keep the skin on. The skin is what the buttermilk wash and breading grip onto. Without it, you lose that anchor and the coating is more likely to slide.
How to remove the thigh bone
I prefer bone-in thighs for flavor, but removing the bone means they cook faster and more evenly. Here’s how I do it:
Flip the thigh skin-side down. Feel for the center bone and cut through the meat along its length to expose it (don’t cut all the way through to the other side). I use kitchen scissors, but a paring knife works too.
Snip the cartilage at the top and bottom of the bone, then run a knife along the underside to free it from the meat.
Pull the bone out gently with your fingers. It should come out clean.
Other breading options (and why I don't use them here)
I’ve tried every one of these in the deep fryer. They taste fine, but the coating peels off in hot oil instead of staying on the chicken. I have a video of my experiment if you want to see what I mean.
These breading options work much better for pan frying. My breaded chicken cutlets and keto chicken katsu both use them with great results. The difference is that pan frying is gentler on the coating. In a deep fryer, the oil circulation pulls those breadings right off. Whey protein is the only one that grips and holds.
How to store, freeze, and reheat leftovers
Refrigerator: Store leftover pieces in an airtight container for up to 3-4 days. I usually stack them with parchment between layers so the coating doesn’t stick together.
Freezer: These freeze well for up to 3 months. Let the chicken cool completely, then arrange in a single layer on a baking sheet and freeze for about an hour. Once firm, transfer to a freezer bag. The single-layer freeze keeps them from clumping into a block.
Reheating (this is key): I reheat in the air fryer at 375 for 3-5 minutes and the coating crisps right back up. From frozen, add a few extra minutes. The oven works too (400 degrees, 10-15 minutes on a wire rack), but the air fryer gives you that just-fried crunch. Never microwave these. It turns the coating soft and chewy. If you’re looking for another way to use leftover chicken, shred it into my low carb tuscan chicken pasta for a completely different meal.
Seven rules before you fry
Fry in a Dutch oven or another heavy pot. The oil holds its temperature far better than a thin saucepan. If some pieces come out golden and others pale, uneven oil temperature is almost always why. A reader tested the same batch in a saucepan and then a Dutch oven and saw the difference immediately.
If you refrigerated the chicken overnight, let it come to room temperature for 30 minutes before frying. Cold chicken drops your oil temp and gives you an uneven crust.
Only coat as many pieces as your pot can hold at once. If I'm doing a full batch, I work in rounds of 3-4 pieces.
Tap off excess buttermilk wash before you hit the breading. Too much liquid makes a paste instead of a crust.
Fry your chicken the second you finish coating it. I cannot stress this enough. If protein powder sits on the wet buttermilk wash, it absorbs the moisture and turns gummy. I ruined an entire batch figuring this out.
Press the breading into the chicken firmly but gently. You want it to stick, not clump.
Don't crowd the pot. Pieces bumping into each other will knock off the coating you just spent time building up.
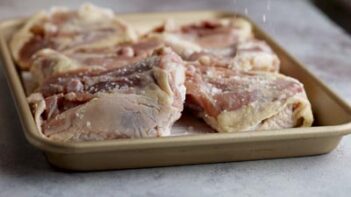
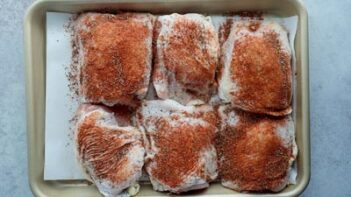
Place chicken on a baking sheet lined with a paper towel. Sprinkle salt all over chicken. Set aside at room temperature for 30 minutes or refrigerate overnight.
For this step
chicken thighs, legs, wings or breast
2 tablespoons kosher salt
2
Make spice blend
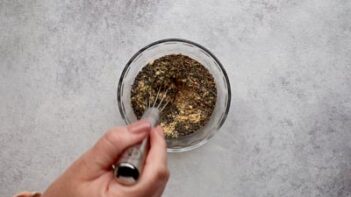
Make the spice blend, by combining remaining seasoning ingredients in a small bowl. Reserve half of the seasoning mix for the breading mixture.
For this step
3 tablespoons smoked paprika
1 tablespoon garlic salt
1 tablespoon ground ginger
1 tablespoon black pepper
1 tablespoon ground mustard
2 teaspoons dried thyme
1 teaspoon celery seed
1 teaspoon dried oregano
3
Coat with the spice blend
Pat the chicken dry on both sides with a paper towel. Coat the chicken all over with about half of the seasoning mixture.
4
Homemade buttermilk
Make homemade buttermilk by adding white vinegar to heavy cream. Stir and let sit for 15-30 minutes.
For this step
1 cup heavy whipping cream
2 teaspoons white vinegar
5
Prepare oil for frying
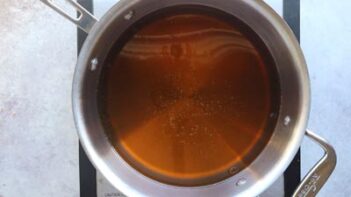
Add enough avocado oil to a saucepan or large Dutch oven to cover the chicken completely. Heat oil over medium heat until the oil is about 350 degrees. Create a cooling station for the fried chicken by lining a baking sheet with paper towels and place a wire rack over on top.
6
Buttermilk wash
Make buttermilk wash by combining the buttermilk, egg whites, vodka and baking powder in a shallow bowl.
For this step
keto buttermilk from step 4
2 egg whites
2 tablespoons vodka, optional
1 teaspoon baking powder
7
Crispy breading
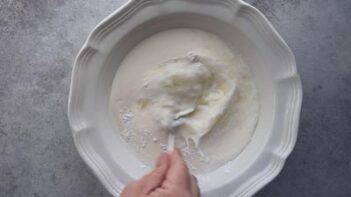
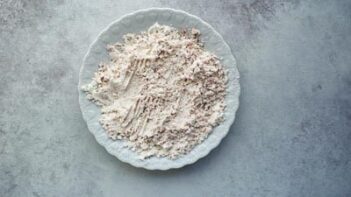
In a large shallow bowl, combine protein powder, baking powder, salt and remaining spice mix for the breading.
For this step
2 cups unflavored whey protein powder
1 teaspoon baking powder
1 teaspoon salt
Remaining spice mix
8
Coat chicken
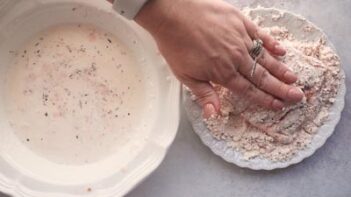
Work with only enough chicken that will fit in your fry pot at one time. Dip one piece of chicken in the buttermilk wash to completely coat. Then place in breading mixture. Flip the chicken in the breading and press the breading in to create a thick layer to completely coat the chicken.
9
Deep fry chicken
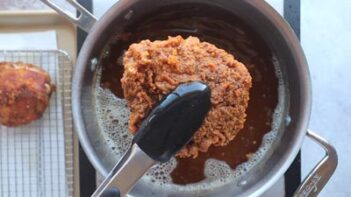
Fry chicken in the hot oil bath until the internal temp is 165 (about 12-15 minutes). Flip the chicken in the fry bath occasionally to get all sides evenly cooked. Transfer chicken to the cooling rack. Repeat with remaining chicken.
Nutrition
Per serving: 1 chicken thigh
Calories
417
Fat
26.6g
Protein
40.7g
Total carbs
3g
Net carbs
1.9g
Nutrition is an estimate calculated from the ingredients listed. Brands vary, so check labels if you track closely.
Frequently Asked Questions
Is fried chicken keto?
Regular fried chicken is not keto, because the flour or cornstarch breading packs in the carbs. I swapped the flour for unflavored whey protein powder, which fries up just as crispy with zero carbs. That single change is what makes this version work at under 2 grams of net carbs per piece. The skin and the oil were never the issue for me. The breading always was, and this coating is what finally solved it.
Can I make keto fried chicken in an air fryer?
I've tested this both ways. For the air fryer, I spray each coated piece with avocado oil and cook at 400 degrees for about 18-20 minutes, flipping halfway. I still check the thickest part with a thermometer and pull at 165 degrees internal. The coating holds up well, but the texture is different from deep frying. You get crispy skin, but you don't get those same flaky, shattery layers that hot oil creates. It's still really good, just a different result. If you love the air fryer, try my air fryer pork chops too.
What internal temperature should the chicken reach?
I pull at 165 degrees internal, every time. I use an instant-read thermometer and check the thickest part of the meat. The timing in the recipe (12-15 minutes) is a guide, but I've learned to trust the thermometer over the clock. Thigh size varies a lot, and I've had pieces that needed a few extra minutes to hit 165.
My chicken thighs took way longer than 15 minutes. Is that normal?
Completely normal. Thigh sizes vary a lot, and bone-in pieces especially can take extra time. One of my readers reported needing a full 5 extra minutes on her batch. I've seen the same thing in my kitchen. The fix is simple: ignore the clock and use a thermometer. Pull at 165 degrees internal and you're good regardless of how long it takes.
Can I add cayenne or other heat to the spice blend?
I love this move. A pinch of cayenne (start with 1/2 teaspoon) blends in without overpowering the smoked paprika. One of my readers adds it to every batch now and says the heat builds slowly at the end instead of hitting you up front. I'd add it to the main spice blend before seasoning the chicken so it distributes evenly.
Can I bake this in the oven instead of deep frying?
I've done oven batches when I didn't want to deal with the oil. Place coated pieces on a wire rack over a baking sheet, spray with avocado oil, and bake at 425 for about 35-40 minutes, flipping once. Check the thickest piece with an instant-read thermometer and pull at 165 degrees internal. The coating holds on and you get a decent crunch, but it won't be the same as deep frying. The flaky, crackly layers that hot oil creates are hard to replicate in an oven. Still a solid option if deep frying isn't your thing.
What is the best keto batter for fried chicken?
Unflavored whey protein powder is the best keto breading I have tested. It grips the chicken and holds through a full 12-15 minute deep fry, while almond flour and pork rinds peel off in hot oil. I mix 2 cups of whey protein with baking powder, salt, and my reserved spice blend, then dip each piece in a buttermilk wash first so the breading has something to grab onto.
Can I eat KFC fried chicken on keto?
No. KFC fried chicken is breaded in flour, and that breading packs in too many carbs for keto. This copycat is how I fixed that craving. The spice blend gets you the KFC flavor, celery seed and ground ginger included, and the whey protein coating keeps each piece at 1.9 grams of net carbs.
I’d go all drumsticks if you’re feeding a group, they’re easier to grab off a platter and nobody has to sit down with a plate. Did a double batch for my book club and left them uncovered on the counter, still crisp about two hours later. Most of the group isn’t keto and the platter was empty.
Six pieces hit the fridge Sunday, uncovered. Wednesday, 375 for 8 minutes, and the crunch came back like it just came out of the oil. That’s the part I didn’t expect to hold. At 40g protein a serving, this stays on the weekly prep list. I double the spice blend every time now so the next batch takes two minutes to coat instead of ten.
Never deep fried anything before, but seeing that coating actually hold up in the fryer is what sold me. Roughly how much oil do you need in a Dutch oven to get the chicken fully submerged? And can you tell the oil is ready visually, or do you really need a thermometer?
I fill mine about 4 inches deep and flip the pieces halfway through. Thermometer, no question. A wooden spoon will bubble around 350, but it’s not precise enough, chicken needs the oil in that 350-375 range or the coating browns before the meat cooks through.
Letting the coated chicken rest 10 minutes before frying fixed my crust problem. First time I skipped it, the breading shifted in the oil and I lost half the coating. Worth building into your prep.
First time frying and already adjusting the blend. More paprika is smart, the coating absorbs it well. I go at least 3 inches of oil so the pieces float.
Two weeks and he hasn’t caught on yet. That’s the real test. The celery seed is the ingredient most people can’t place. They taste something familiar but can’t name it, and that’s what the blend is built around. Took me forever to nail that specific piece.
I had tried two other keto fried chicken recipes before this one and both times the coating slid right off in the oil (which is a very depressing thing to watch happen). Made this one expecting the same result. The coating stayed, completely, golden and crispy all the way through. Something about the spice blend here is doing what the others couldn’t, and using skin-on thighs made a real difference in how it all held together.
Skin-on is non-negotiable for this one. The fat renders in the oil and that’s what holds the coating against the chicken. Boneless skinless is where those coating disasters start.
Bringing this to a cookout Saturday and there’s no way I’m dragging a deep fryer to someone’s backyard. Can I make it the night before and reheat in the oven without it going soggy? Fried chicken gets sad when it sits and I’m a little nervous.
Wire rack on a baking sheet, 400 degrees, about 12-15 minutes. Don’t cover it or you’ll steam the crust right off. The whey protein coating on this one holds up overnight in the fridge better than most fried chicken – you’ll be fine.
My son asked three times if I actually made this or secretly picked up takeout. Something about the spice blend (the smoked paprika in particular) really sold it. We’re doing Sunday fried chicken nights from here on out.
Ha. Kids are the toughest judges. The smoked paprika took the most rounds of testing to dial in (had to back it off twice before it stopped overpowering everything else).
Added a couple tablespoons of hot sauce to the buttermilk and left the chicken overnight instead of the suggested time. The difference in the crust was real. More depth, and the smoked paprika came through into the meat rather than just sitting on the surface. Small change, but the texture was different enough that I won’t skip it again.nnOne thing if you’re frying in batches: keep finished pieces on a wire rack in a 200-degree oven, not paper towels. Paper towels trap steam and the crust softens faster than you’d think. The rack keeps air circulating underneath, and the last piece off the stove is just as crispy as the first.
The hot sauce in the buttermilk is something I keep meaning to test. Makes sense it drives the paprika deeper, the acid has more time to work. And yes on the rack, paper towels are the enemy.
I let mine soak overnight instead of the 30-minute rest. The meat was noticeably more tender, and the spice got deeper into it too. Made it for Sunday dinner last week and the crust held up even after sitting 20 minutes while everyone got settled. Won’t go back.
The 20-minute sit without the crust going soft is the real test. Most batches don’t survive that. Overnight clearly does something to the meat structure that a quick brine just can’t match. Hearing this enough that I may need to update the recipe note.
Making this for a family reunion in a few weeks, tripling the batch to about 24 pieces. Spice math is easy. What I’m less sure about is oil recovery time. I batch fry regularly but not at this volume. You mentioned the coating holds up better in the deep fryer than other keto versions, and I don’t want to rush the temp and lose that. Do you fry a set number, wait for full recovery, then go again? Or just adjust cook time as you go?
Set number, wait for the temp to come back up. For 24 pieces I’d do 4-5 at a time and give it a couple minutes between batches. The coating on this one is finicky about oil temp , drops below range and it soaks instead of crisps.
Tried soaking overnight in heavy cream instead of the usual 30 minutes and the meat was noticeably more tender all the way through. The coating still held up in the oil, which I honestly wasn’t sure it would. Worth the extra planning.
I’ve ruined so many keto fried chicken attempts with coatings that slide right off the second they hit oil. Made this one expecting the same. Coating stayed on, came out crispy. That spice blend is freaking good.
Letting the spiced chicken rest uncovered in the fridge a couple hours before the buttermilk dip makes a real difference in how the coating grips. Did a side-by-side (half rested, half straight to the dip) and the rested pieces came out noticeably thicker and craggier. The Dutch oven with avocado oil held heat so steady I stopped hovering over the thermometer after the second batch. First keto fried chicken where the coating actually crackles.
That fridge rest is a real technique. Uncovered pulls moisture off the surface so the coating has something to grab onto instead of sliding. Craggier every time.
The spice blend here is so close to what my grandmother used on her Sunday chicken that I had to stop and just take it in. Made mine with drumsticks, fried in avocado oil, and pulled off that same golden crust she always had. Didn’t expect to feel that.
The vodka helps the coating crisp up faster because it evaporates quicker than water during frying. But it totally works without it too, so no worries.